This is a continuation of my previous post on the graphics pipeline and some fundamental tricks.
Now that we’ve totally mastered how shaders work, let’s use them in some non-traditional ways.
Shader Shenanigans
Reconstructing World Position in the Fragment
Previously we’ve learned these 2 relevant things:
-
Getting a Screen space (0,1) uv to sample from a screen buffer (like color, depth, normals, your own RT etc.):
-
vert:
o.uv = ComputeScreenPos(o.position); //where o.position = mul(UNITY_MATRIX_MVP, v.vertex); -
frag:
float2 uv = i.uv.xy / i.uv.w;
-
-
Getting a Screen space (0,1) i.position for the geometry we’re currently drawing:
-
vert:
o.position = mul(UNITY_MATRIX_MVP, v.vertex); -
frag:
i.position.xy /= _ScreenParams.xy; //_ScreenParams.xy == width and height in px;
-
Now we’ll learn how to make a ray that samples from the pre-existing rendered geometry, in View space. Then we’ll convert it easily to World space and even back to Object space:
1
2
3
4
5
6
7
//Vertex shader
{
	//...
	o.ray_vs = float4(mul(UNITY_MATRIX_MV, v.vertex).xyz * float3(-1,-1,1),1);
	//float3(-1,-1,1) just flips the coordinates (the canvas).
	//...
}
1
2
3
4
5
6
7
8
9
10
11
12
13
14
15
16
17
18
19
20
21
//Fragment shader
{
	//...
	//ray in view space
	i.ray_vs = i.ray_vs * (_ProjectionParams.z / i.ray_vs.z);
	//_ProjectionParams.z is camera's far clip plane. E.g. 3000.
	//i.ray_vs.z is between -1 and 1.

	//our reconstructed View position for whatever is already on the screen under the fragment we're about to draw:
	float4 vpos = float4(i.ray_vs.xyz * depth,1);
	//depth is between 0 and 1.
	//the result is (-1,1) from bottom left front, with camera at centre (0,0,0).

	//and now we have our unity world coordinates for this fragment!
	float3 wpos = mul(unity_CameraToWorld, vpos).xyz;
	//you can even get the object space if you want.
	float3 opos = mul(unity_WorldToObject, float4(wpos,1)).xyz;
	//these are builtin unity matrices which are the inverse of the M and V matrices.

	//...
}
The object space would be useful for example if you want to see if a pre-existing fragment would be masked by a cubemap that originates at your current geometry’s position:
float mask = texCUBE(_CubeTex, objPos).a;//(in the fragment). With this trick we pretend we have geometry with our current mesh’s centre, but the underlying geometry’s surface, in object space.
Since we also have our current geometry’s Screen space position, we can convert that as well to view space and world space and object space. So you can compare or blend with the equivalent from the underlying pre-existing geometry we sampled.
Solid Texturing
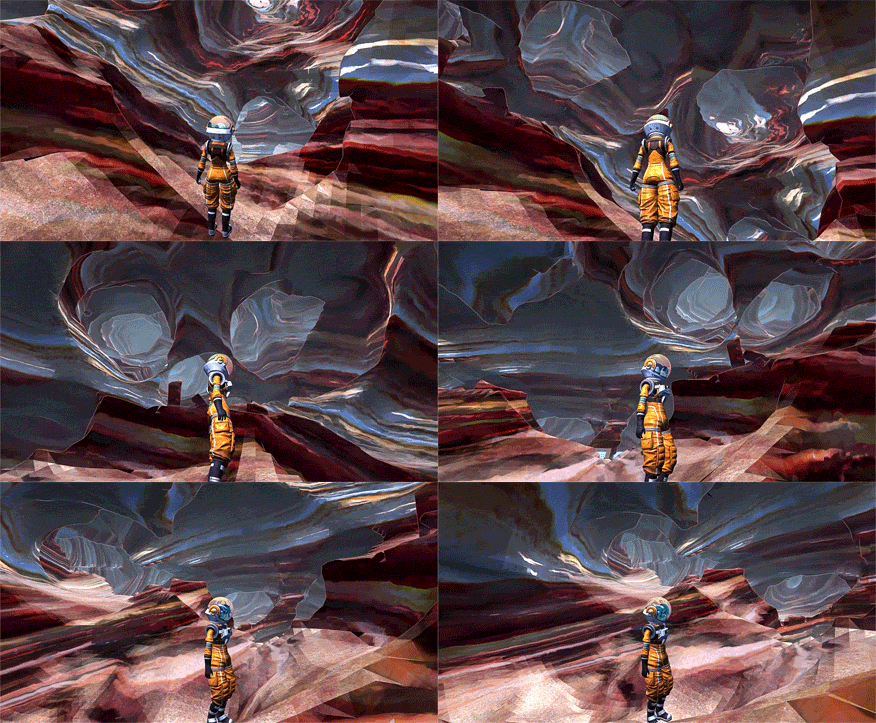
With the worldspace position (of either the pre-existing geometry’s fragment or the current one) you we can do what is called Triplanar Texture Projection or Solid Texturing. This is what you most often find on procedural meshes you obtain from voxels, which don’t have sensical UV coorinates, so you just say “everything on top is grass, everything on the sides is ground”.

Here’s how I did that:
1
2
3
4
5
6
7
8
9
10
11
12
13
14
15
16
17
18
19
20
21
22
23
24
25
26
27
28
29
30
31
32
33
34
35
36
37
//Fragment
{
	//Get your Normals either from the mesh, or from a GBuffer of the pre-existing stuff.
	half4 normal = ...

	//Get your world position. Again, either of your geometry or the pre-existing stuff in the buffer.
	float3 wpos = ...

	//Our UVs are the world position. _LocationBump is just a float or float3 offset. Helps further move the noise seed.
	half3 uv = wpos.xyz + _LocationBump;
	//To make the canyon stratification wavy texture, I used Curled Simplex Noise to distort the texture lookup (the uvs).
	half3 uv_curled = uv + uv * normalize(get_Curl(uv / _Freq, _Seed)) / _Amplitude;

	//Each plane has its own texture. Texture sampling repeats (unless set to Clamp), so we're fine sampling a world position which is protentially way larger than 1.
	float2 coord1 = i.uv_curled.xy *_MainTexZ_ST.xy + _MainTexZ_ST.zw;
	float2 coord2 = i.uv.zx *_MainTexY_ST.xy + _MainTexY_ST.zw;// we don't want to curl the top
	float2 coord3 = i.uv_curled.zy *_MainTexX_ST.xy + _MainTexX_ST.zw;

	float3 blend_weights = abs(wnormal);
	//This is how you tweak the width of the transition zone;
	blend_weights = blend_weights -_BlendZone;
	//Make the weights sum up to a total of 1
	blend_weights /= ((blend_weights.x + blend_weights.y + blend_weights.z)).xxx;

	//Sample our 3 textures. Tex 1 and 3 can be the same texture (in my canyon case).
	fixed4 col1 = tex2D(_MainTexZ, coord1.xy);
	fixed4 col2 = tex2D(_MainTexY, coord2.xy);
	fixed4 col3 = tex2D(_MainTexX, coord3.xy);

	//Now blend the colours
	half3 blended_color = (
				col1.xyz * blend_weights.xxx +
				col3.xyz * blend_weights.zzz
				)
				+ col2.xyz * blend_weights.yyy;
	//...
}
Now profit! You can similarly sample from a bumpmap and warp the normals for the lighting step.
You can find the Simplex Noise (and other noises) on GitHub.
Command Buffers
Before we look at more advanced stuff like deferred lighting and post FX, let’s briefly look at the CommandBuffer. Unity made plenty of documentation and examples for it, so I’ll just explain what the key points mean.
Note: Notice that a CommandBuffer sends a program to the GPU that runs every frame, so unless you need to change the program or update the data structures from the C# side, you shouldn’t clear and run the Draw or Blit commands every frame from C#.
The Command Buffer allows you to insert render materials and geometry at any stage of Unity’s rendering pipeline. You set that with CameraEvent.m_BeforeAlpha etc.. To see what’s going on, go to Window > Frame Debugger and visualise your changes as well as see the default pipeline at work.
Note: Unity will hijack some (parts) of these render targets at certain points in the pipeline, and you won’t have access. For ex if you want any of your custom deferred shaders to write to the built in emission buffer, and do your own lights, you must use the CameraEvent.AfterLighting stage.
Draw a mesh with the CB:
1
2
3
4
//This is the Model to World space matrix that will be applied to our mesh in the vertex shader:
Matrix4x4 transMatrix = Matrix4x4.TRS(m_GO.transform.position, m_GO.transform.rotation, m_GO.transform.scale);
//Draw this mesh with our material
m_CB_arr[(int)CBs.BeforeAlpha].DrawMesh(m_CubeMesh, transMatrix, m_SomeMaterial, 0, 0);
This is also one of the ways to implement your own lighting. Draw a cube or a sphere, for each light, with your deferred lighting material. This is what unity does internally, and it draws spheres. It ain’t the most efficient way to do deferred lighting, but it’s easy because the mesh defines the volume and provides the matrix.
Blit a texture with the CB:
The Blit works by sending a fullscreen quad to the GPU, so that in the fragment you’ll have one pixel for every Screen space pixel, so you can do post processing or deferred processing.
1
2
3
4
5
int fullscreenRT = Shader.PropertyToID("_FullscreenRT");
m_CB_arr[(int)CBs.BeforeAlpha].GetTemporaryRT(fullscreenRT, mainCam.pixelWidth, mainCam.pixelHeight, 0,FilterMode.Trilinear, RenderTextureFormat.ARGB32);
//This is where you run your material on that texture.
m_CB_arr[(int)CBs.BeforeAlpha].Blit(fullscreenRT, BuiltinRenderTextureType.CameraTarget, fullscreenMaterial);
m_CB_arr[(int)CBs.BeforeAlpha].ReleaseTemporaryRT(fullscreenRT);
That _FullscreenRT is a texture defined in the shader of your fullscreenMaterial:
1
2
sampler2D _FullscreenRT;
float4 _FullscreenRT_ST;
This would also be the pro way of doing deferred lighting. You’d have a list of lights, you’d traverse these pixels once, and light them. A common AAA method is to use a “Tiled Frustum” where you divide this texture in a grid, and have each tile reference only the lights that affect it. And you also do this grid depth wise, so lights that are far away are drawn with simpler math.
DrawProcedural with the CB:
This method draws custom data buffers with the vertex and triangles paradigm, or just with glPoints.
1
m_CB_arr[(int)CBs.BeforeAlpha].DrawProcedural(Matrix4x4.identity, customBillboardMaterial, 0, MeshTopology.Triangles, 6, particleCount);
Remember back when I said you can have custom DirectX11 vertex shaders that run on data buffers? (FragInput vert (uint id : SV_VertexID, uint inst : SV_InstanceID))
This is how you run them in Unity with C#. In this case I defined a quad with 6 independent vertices, and the vertex shader will run 6 times for each particle in particleCount.
Alright, that’s enough for now. I’ll make a separate post explaining more advanced stuff like implementing lighting, and running Compute Shaders and managing memory and data structures.
